Disegna technological decking is easy and simple to install. The quality of the materials used in the installation is a key factor in obtaining an installation with an optimum finish. That is why, throughout the installation process, we recommend the use of original components and accessories.
Recomendations

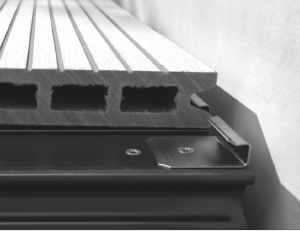
Place the edge of the staple on the side of the joist, so that the screw is centred on the latter.

If a uniform tonality is desired, arrange the arrows printed on the edge of each board so that they point in the same direction.

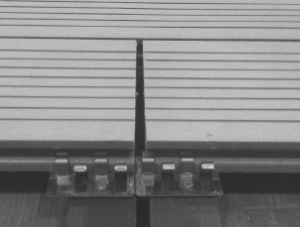
ALWAYS leave a gap with vertical face of at least 10mm.

At the boards converge, each board has to match on a INDEPENDENT point of support and be fixed to it by two fixations, one on each board.
- This product is NOT suitable for structural use NEITHER for submergence in water. It is also not suitable for poorly ventilated and/or without ventilation spaces.
- Always install it on a level surface. If you desired an uniform tonality, put the arrows printed on the edge of each board, pointing to the same direction.
- To make a manhole cover, make an independent perimeter sub-structure and fix the board using the screws and fixations.
- In installations with high levels of water condensation and high temperatures (Spa, Sauna, etc …) is recommended to leave an END-to-END gap of 15mm and 20mm with walls and / or columns.
- The maximum separation between joists will always be 40cm. For high traffic decking fit the joists every 30cm.
- After decking installation and during 2-3 month, clean with plenty of watwwer the decking surface to remove out of the decking instalation the dust and dirt produced during the decking manufacturing and installation to prevent the formation of water marks on account of dus and dirt.
- The location of the boards´heads has ALWAYS to match on a joist or point of support and be fixed to it by two fixations (one on each board).
- In areas with high humidity (coast zone and/or with abundant rainfalls) increase in 3mm more the END-to-END gap indicated on point 4 and in 5mm more the gap indicated in point 2 of the Installation Manual.
